Voicemail Campaigns - Listing and Filtering
Overview
The Voicemail Campaigns section allows users to view and manage all voicemail campaigns in one place. This article will guide you through the listing and filtering features to help you find and organize campaigns effectively.
Accessing the Voicemail Campaigns Section
Log in to your account.
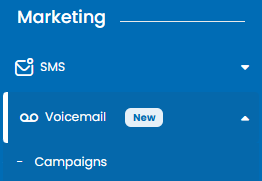
Navigate to the left-hand menu.
Under the Marketing section, select Voicemail > Campaigns.
Features in the Campaigns Listing Page
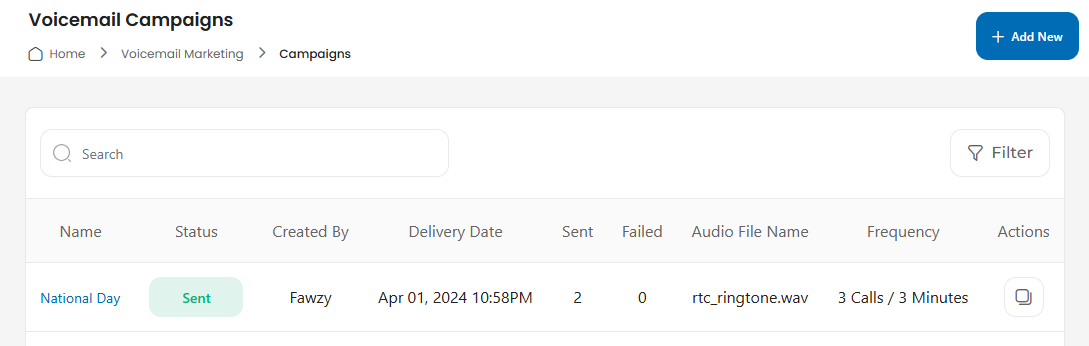
Search Bar:
Use the search bar to quickly find campaigns by name.
Columns:
Name: Displays the name of the campaign.
Status: Shows whether the campaign is active, scheduled, or sent.
Created By: Indicates the creator of the campaign.
Delivery Date: Specifies the date and time the campaign was sent or scheduled.
Sent/Failed: Displays the number of successfully sent and failed messages.
Audio File Name: Shows the name of the audio file used.
Frequency: Indicates the number of calls and their intervals.
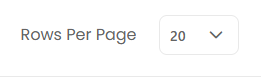
Rows Per Page:
Adjust the number of campaigns displayed per page (e.g., 10, 20, 50).
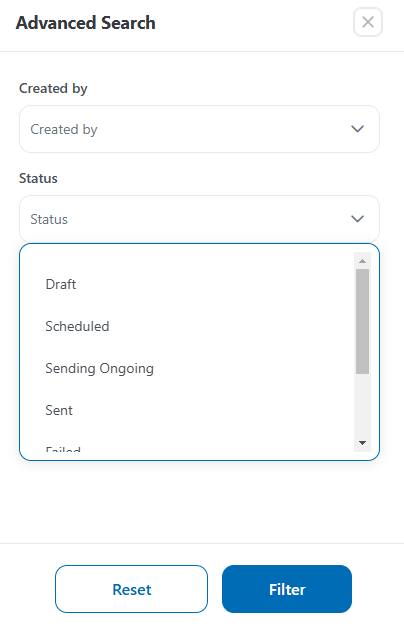
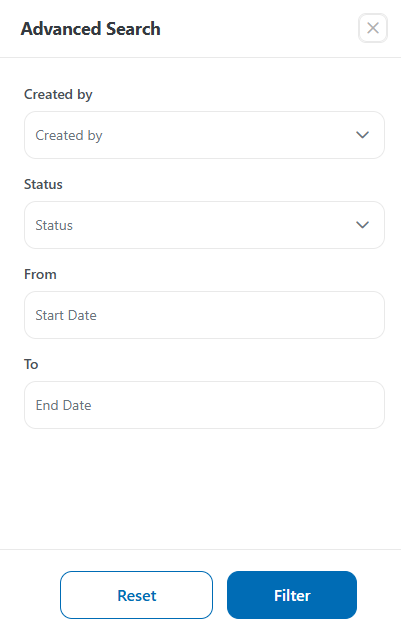
Filter Button:
Click the Filter button to narrow down results based on:
Status (e.g., Sent, Scheduled).
Delivery Date.
Creator.
Actions:
Use the Actions menu to edit or delete a campaign.
How to Filter Campaigns
Click the Filter button at the top-right corner.
Choose your filter criteria (e.g., Status: Sent).
Click Apply to see the filtered results.
To clear the filter, click Reset.
Accessing the Voicemail Campaigns Section
Log in to your account.
Navigate to the left-hand menu.
Under the Marketing section, select Voicemail > Campaigns.
Search Bar:
Use the search bar to quickly find campaigns by name.
Columns:
Name: Displays the name of the campaign.
Status: Shows whether the campaign is active, scheduled, or sent.
Created By: Indicates the creator of the campaign.
Delivery Date: Specifies the date and time the campaign was sent or scheduled.
Sent/Failed: Displays the number of successfully sent and failed messages.
Audio File Name: Shows the name of the audio file used.
Frequency: Indicates the number of calls and their intervals.
Rows Per Page:
Adjust the number of campaigns displayed per page (e.g., 10, 20, 50).
Filter Button:
Click the Filter button to narrow down results based on:
Status (e.g., Sent, Scheduled).
Delivery Date.
Creator.
Actions:
Use the Actions menu to edit or delete a campaign.

Click the Filter button at the top-right corner.
Choose your filter criteria (e.g., Status: Sent).
Click Apply to see the filtered results.
To clear the filter, click Reset.