The Payment History feature allows you to review all the transactions made in your Nextelco account, including auto-refills and manual payments. Follow these steps to access and review your payment history:
Step 1: Access the Billing Section
- Log in to your Nextelco account.
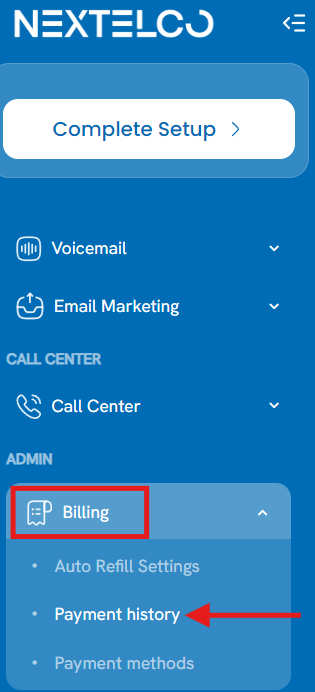
- From the dashboard, navigate to the Billing section on the left-hand menu.

Step 2: View Payment History
- Under the Billing menu, click on Payment History.
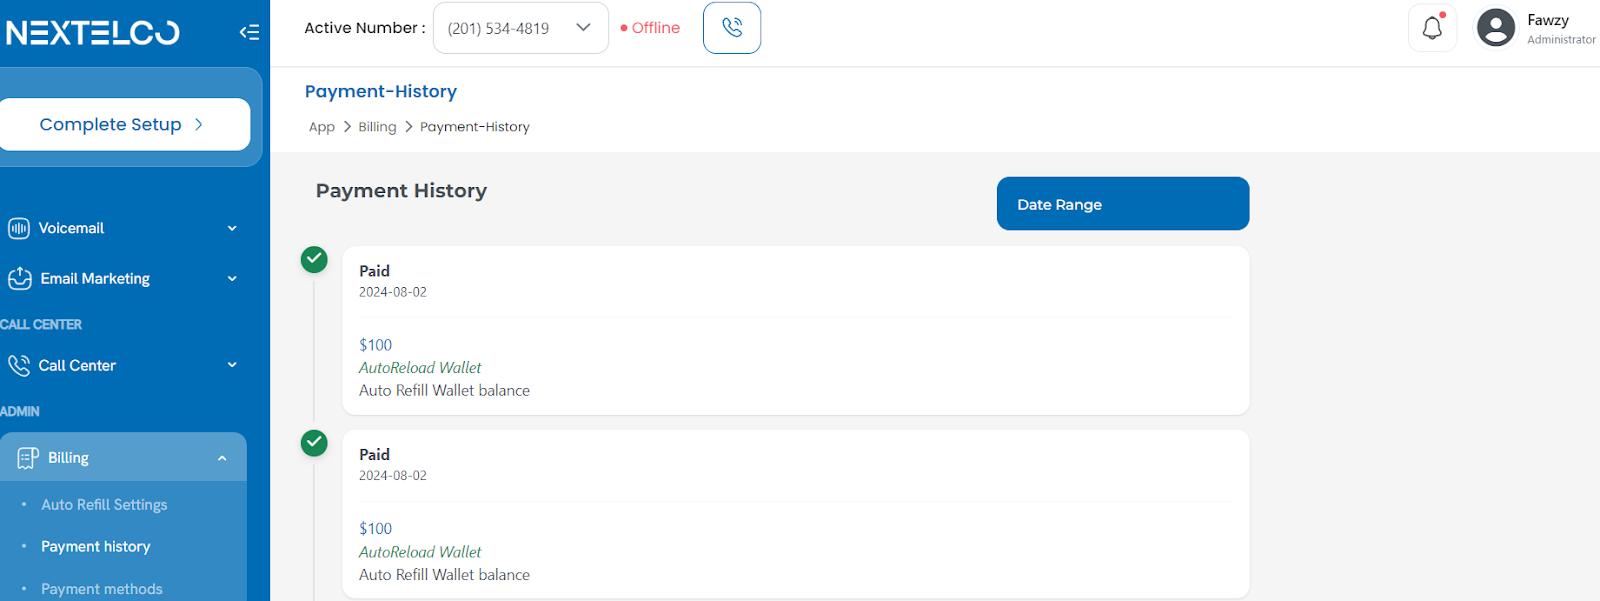
- The Payment History page will display a list of all your recent transactions, including:
- Transaction Status: Shows whether the payment was successful (e.g., “Paid”).
- Date: The date the transaction was made.
- Amount: The amount credited to your account.
- Description: Details like “AutoReload Wallet” or other specific notes regarding the payment.
- You can scroll through the list to view all past transactions.
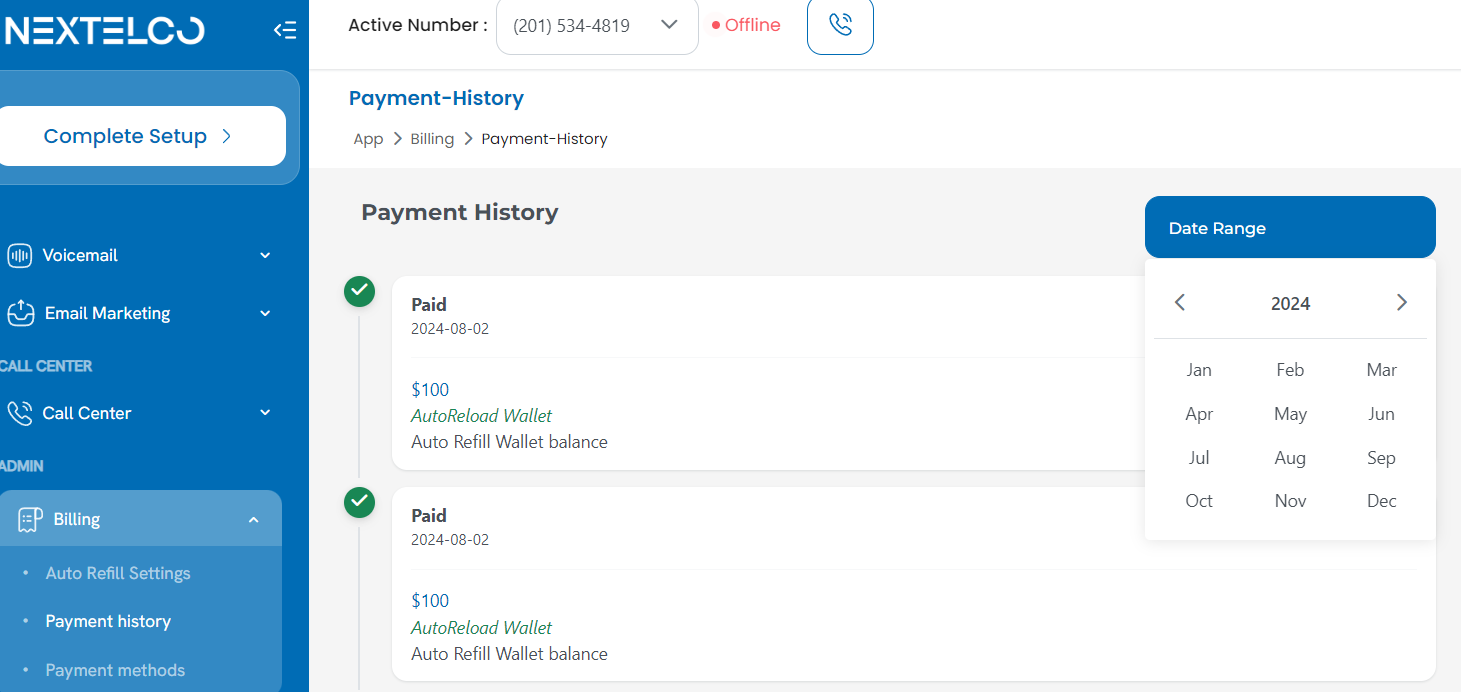
Step 3: Filter Payment History by Date
- To view transactions within a specific time frame, click on the Date Range button located at the top right of the Payment History page.
- Select your desired start and end dates.
You now know how to easily access and review your payment history in Nextelco. This feature is particularly useful for keeping track of your spending and ensuring that your account is consistently funded.
- Click on Auto Refill Settings under the Billing menu.
Step 2: Enable the Auto Refill Service
- On the Auto Refill page, ensure the toggle switch at the top right is turned on to enable the service.
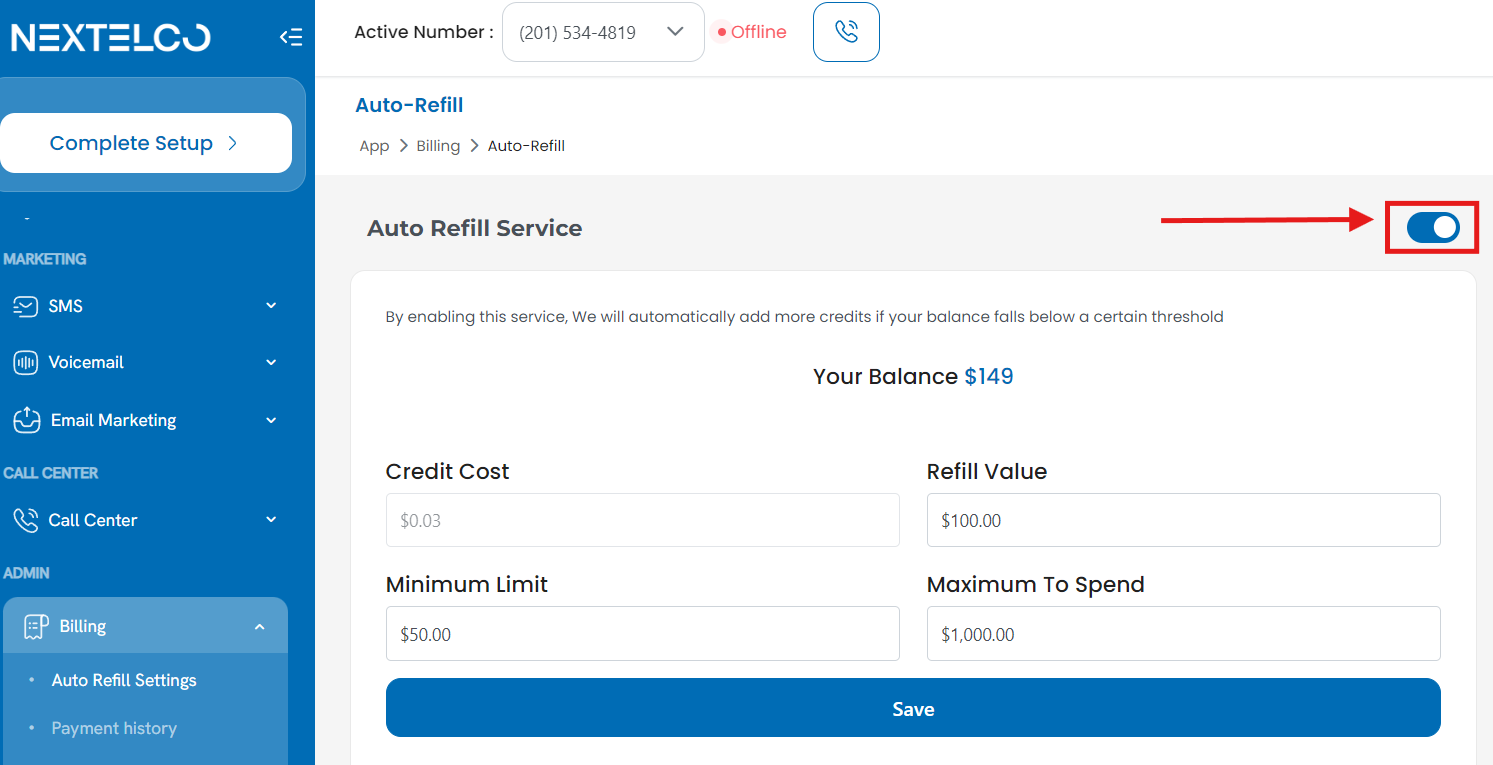
Step 3: Set Up Refill Preferences
- Credit Cost: This displays the cost per credit, which is usually predefined.
- Refill Value: Enter the amount of money you want to add to your account each time the auto-refill triggers. This is the amount that will be credited to your balance.
- Minimum Limit: Set the minimum balance threshold. When your balance drops below this limit, the auto-refill will be triggered.
- Maximum To Spend: Set a cap on how much you are willing to spend on refills in a single session. This ensures you don’t exceed your budget.
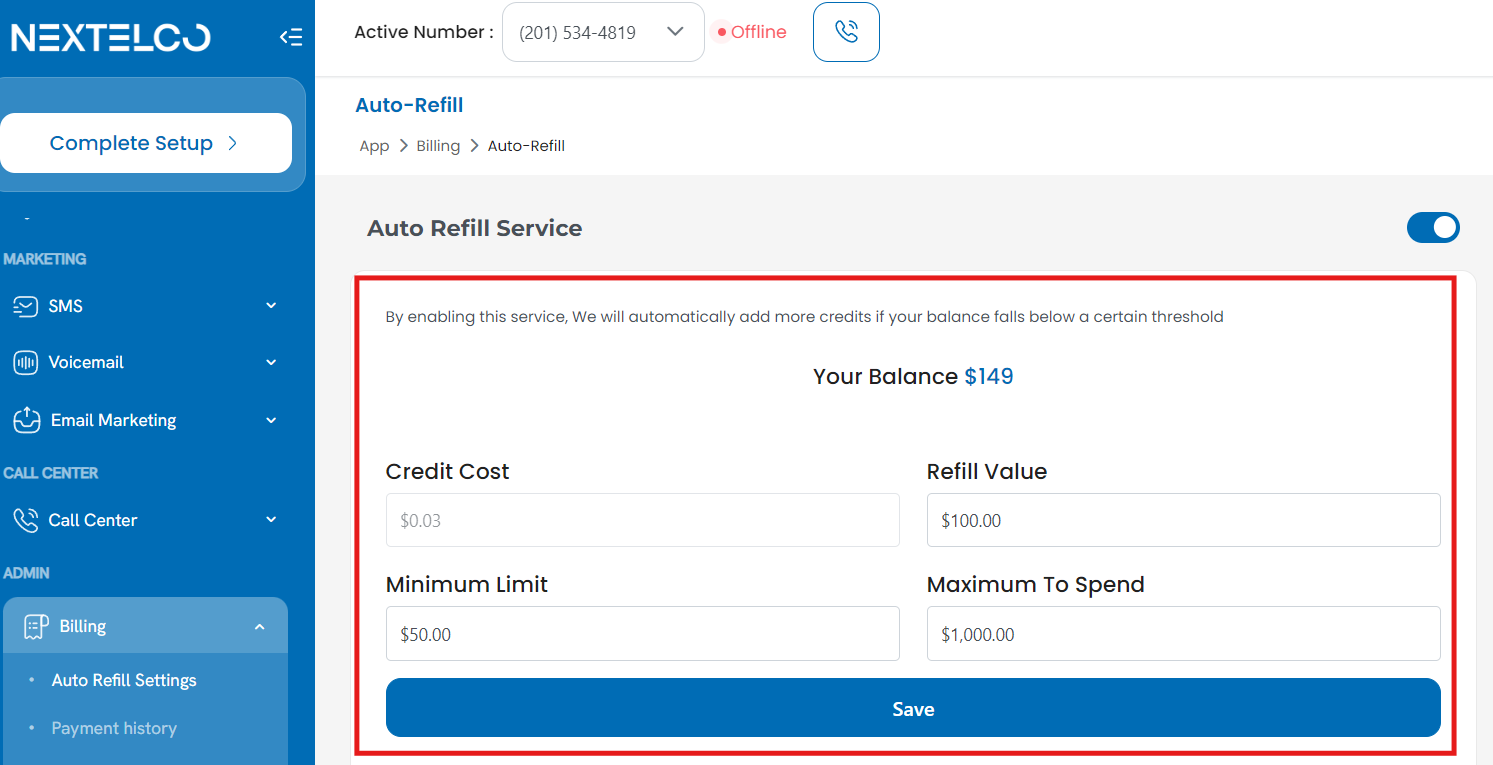
Step 4: Save Your Settings
- After configuring your preferences, click on the Save button at the bottom of the page to apply your settings.
Your Auto Refill is now set up! With these settings, you can ensure that your Nextelco account always has the necessary credits to operate smoothly.
